There’s no underselling the importance of having a solid online footprint. Successful companies today not only have a website to reach more customers, drive growth, and increase revenue but realize the value of having a memorable, relevant domain name for your website.
However, finding and purchasing a domain name can be overwhelming and challenging. So, we’ve analyzed different domain registrars and summarized our findings in this article. Read on to find out how to register a domain name in seven easy steps.
Crazy Egg’s Favorite Tools for Registering a Domain Name for Your Website
Below, you’ll find our Golden Eggs, the best domain name registrars among the dozens we researched.
Hostinger is the best way to secure quality hosting and a domain name in one fell swoop. Get web hosting as low as $2.99 per month, plus a drag-and-drop website builder to get you started with ease.
Domain.com offers affordable prices for new domain registrations and low renewal rates. Search Domain.com’s database of available URLs.
Porkbun is ideal for finding alternative domain extensions to .com that can make your URL more memorable. Browse Porkbun’s vast selection today.
Network Solutions is the best way to lock up your domain for the long term—as long as a full century, even. Tap into their wide array of domain buying options.
Namecheap does what its name promises, allowing you to secure a domain and full identity protection for a low price. Lock down your ideal URL today.

More Top Domain Registrars
We’ve gone deep into this category since so many businesses and people need to find a way to find and secure domains in a crowded marketplace. Our reviews analyze and dissect what each of these domain registrars has to offer to help you find the best match for your requirements. Take a look at our top picks for domain registration.
Step 1 – Choose a Reliable Domain Name Registrar
Whether you are purchasing for a business or personal website, you have to secure and register your domain name through a certified registrar. There are a vast number of options to choose from, so this can be tougher than it sounds.
It is crucial to analyze and clearly understand the policies of any domain registrar you may potentially use because the goal here is to find one that can manage your domain name for the long haul. Consider the following when assessing your options:
- Check the transparency of the processes of the company
- Read its rules and policies for domain expiration
- Ask for any additional services that they may provide
- Look for a reliable customer support service
- Check the amount of security provided
- Read reviews of other users about their experience
Pricing, of course, is another thing to pay attention to. You’ll want to examine the initial price tag and any renewal payments to avoid problems later on. Make sure there aren’t any hidden fees that will surprise you later on.
Some of the most popular domain registrars have been mentioned above in our Golden Eggs. We love Hostinger as a reputable all-in-one option.

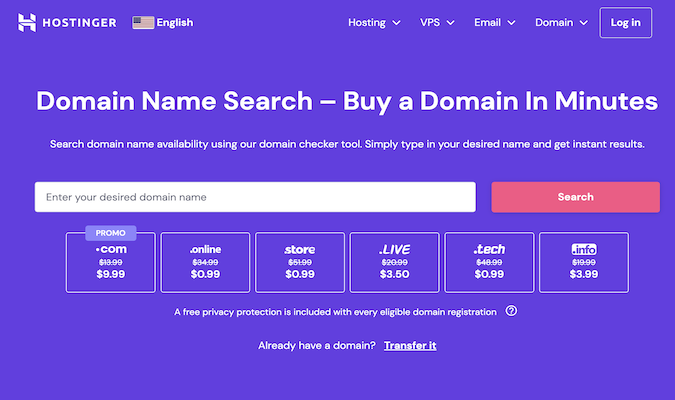
With Hostinger, you can set up all of the essentials to get your website off the ground and accessible to visitors. Search for a domain name, select the best available option, then choose your Hostinger hosting plan, and you’re all set in 15-30 minutes.
Best of all, you may be able to get the first year of that domain for free as a part of your Hostinger hosting plan.
Hostinger is one of the best options overall, but if you already have web hosting secured, look to a quality company that specializes in domain registration, like Domain.com or Porkbun.
Step 2 – Brainstorm and Finalize the Domain Name
Now, let’s not get too far ahead of ourselves. After you’ve chosen a solid registrar, you still need to find an available domain to secure that also fits your brand or website’s identity.
You’re going to want options—a lot of appealing domains (especially with the .com extension) have been claimed already. Make sure that you come up with a list of names and keywords that fit what you’re looking for, as well as alternative extensions (such as .biz, .io, or even .pizza) you’d be comfortable with using. If yourbusinessname.com is already taken, you’re going to need some alternatives you’ll be happy with.
Take your time brainstorming. Just keep in mind these key points that can help guide your process:
- Choose a name that fits your brand
- Avoid double letters if you can (they make your URL easier to misspell)
- Opt for short and concise over a long domain
- Avoid adding any numbers or hyphens to the name
- Make sure it is easy to spell and remember
- Use keywords related to your brand
- Consider using your location (e.g., city or state) in combination with other keywords
If you are struggling with finalizing a name, you can use the help of artificial intelligence suggestions found in some brand and domain name generators. You can find tools like this on Shopify’s website or Namecheap.
Once you have finalized your list of acceptable options, you can move on to the next step of domain name registration: searching for which ones are available to purchase.
Step 3 – Search for the Availability of Your Domain Name
Take your list of options and plug them into your domain registrar of choice’s search bar. Some registrars even let you search in bulk, making this process easier and less headache-inducing.
It can be disappointing to discover your ideal domain name is unavailable. However, it is important to remember that hundreds of thousands of domain name options are out there, and many more are added daily. Just keep an open mind and be willing to modify it a bit.
To get ahead of this step, rank the options you brainstormed in Step 2 in order of preference, so if one is taken, you can just move down the list.
Step 4 – Consider Your TLD
The famous .com that comes at the end of a URL is just one of many top-level domains (TLD), also known as domain extensions or suffixes. You’ve likely heard of others, like .biz or .net for company websites and ones like .gov and .edu for specific and regulated sectors. There are even region-specific extensions. For example, a business in London may use a .uk suffix, or a website in Germany may end in .de.
While a .com is understandably most people’s first choice, you ought to consider the possibilities of less typical or new TLDs. When utilized correctly, these can actually make your URL more memorable than a typical .com.
For example, use extensions like .beauty or .makeup if you’re selling cosmetics, try .health if your site’s focus is medicine or wellness, or lend your new website some extra credibility with a .pro or .expert TLD.
This can be especially useful if you’re a local business. Say you’re a tattoo parlor based in Bellingham, Washington. You could secure Bellingham.tattoo for your shop (which is available at the time of this writing), which would be easy for someone looking to get new ink in the area to remember when they’re looking for a good tattoo parlor.
This also presents an opportunity to save some money, too. Domains using .com tend to be more expensive than their other TLD counterparts (sometimes massively so). However, you could snap up Bellingham.tattoo for just $2.57 for the first year based on current pricing.
This is where a registrar like Porkbun really shines. They have well over 100 alternative TLDs to choose from, and they’re adding new ones and running deals on them all the time.
Step 5 – Add Privacy Protection
This is not a mandatory step in domain registration, but it’s one we highly recommend taking advantage of.
When you buy a domain, Domain ID, you will have to provide information like your name, physical address, email address, and phone number. When you do so, your information is automatically added to the WHOIS database. Therefore, as soon as your domain name is registered, that private information will become available to the public.
However, most registrars will give you the option to add WHOIS privacy and protection at checkout. This shields your information from public view, replacing your personal information with generic information. It also keeps your personal information safe from spammers, hackers, or identity thieves.
Some registrars will make you pay a one-time or annual fee for this. But two of our top picks—Namecheap and Porkbun—offer this for free, forever.
Step 6 – Make Your Purchase
Alright, so now you have your domain picked out and your private information protected. Now it’s time to finally secure your internet real estate and buy it.
The amount you pay will depend on what domain you selected and your chosen registrar. Be mindful of renewal rates at this point—your registrar should clearly show you what the renewal price will be at checkout, alongside what you have to pay today. While the first year may be a steal, your renewal rate could be quite expensive.
Registration terms are also a big consideration at the checkout stage. Many providers offer between one and five years of initial registration; some go up to 10, while others, like Network Solutions, offer up to 100-year terms.
The longer the term you can afford when initially securing your domain, the less you’ll have to worry about renewal, both in terms of renewal rates and making sure you renew your domain on time to avoid losing it to someone else after your term expires.
But it’s not feasible for everyone to pony up five, 10, or 100 years’ worth of registration upfront. That can make your day-one cost rise up into the triple digits. So, carefully consider how much you’re willing to pay now versus how high of a renewal rate you’ll be comfortable with when your initial term lapses.
Step 7 – Verify Ownership and Connect Your Domain to Your Site
The last step in registering a domain name for your website is to verify the domain ownership through the email address that you provided while registering your domain name. Once you finish the domain registration process, you’ll receive an email within a few minutes for verification.
Simply follow the verification link in the email to verify your contact information and the ownership of the domain name.
After that point, you’ll need to set things up so that your new domain name points web visitors to your website. That involves configuring the domain name system (DNS) on your hosting provider’s servers so that your domain points to your website.
If you went with one of our recommended registrars, this will be easy enough. Most will even do it for you without you having to lift a finger. Or, at the very least, their support and help center can guide you through the process and any troubleshooting. And this process is especially easy if you sourced your domain through a hosting provider like Hostinger.


