Every WordPress website has this login URLs by default: yourwebsite.com/wp-login.php
And all hackers, bots, and malicious attackers know this.
Once they reach your login page, they only need to guess your password to get in. By changing your login URL, you make it harder for someone to break into your website.
I strongly recommend that every owner of a WordPress website change their login URL by using a WordPress plugin.
How to Create a Custom WP Login URL With a Plugin
You don’t need to worry about meddling with your site’s code or backend files. Instead, you can install, activate, and configure the right plugin to change the login URL for you.
You can find both paid and free WordPress security plugins for this feature, but I’d recommend going for a free option since there many good ones available.
Here are some of the plugins you should consider installing to change your WordPress login URL:
I’ve used these plugins to change the WordPress login URL of different sites, and they work well. But you can use any plugin you want. Just make sure they’re tested with the latest WordPress version and have mostly positive reviews from users.
Depending on the plugin you install, it shouldn’t take you more than 15-20 min to change your site’s login URL.
That’s the only actual investment required for this task.
5 Steps to Changing Your WordPress Login URL
Let me now show you the exact steps involved in changing your WordPress site’s login URL.
We’ll use the WPS Hide Login plugin for this demonstration since it’s the lightest plugin on the list.
Step 1: Backup Your WordPress Website
Before installing a plugin to create a custom WordPress login URL, you must take a full back of your site.
The plugin we’re using is safe and tested with your WordPress version, so there won’t be any problems 99.9% of the time.
But it’s always better to be safe because if anything goes wrong, you can easily use the backup to revive your site. Your web hosting company usually has an easy backup option.
Step 2: Install The WordPress Plugin To Change Login URL
Once you backup your website, it’s time to install and activate a WordPress plugin to create a custom login URL.
As I’ve already shown you, there are many great plugins for this purpose. But in this post, we’ll use WPS Hide Login.
Here’s how to do it.
Log in to your WordPress website dashboard and click Add New under Plugins in the left menu.

Search for WPS Hide Login in the plugin search box.
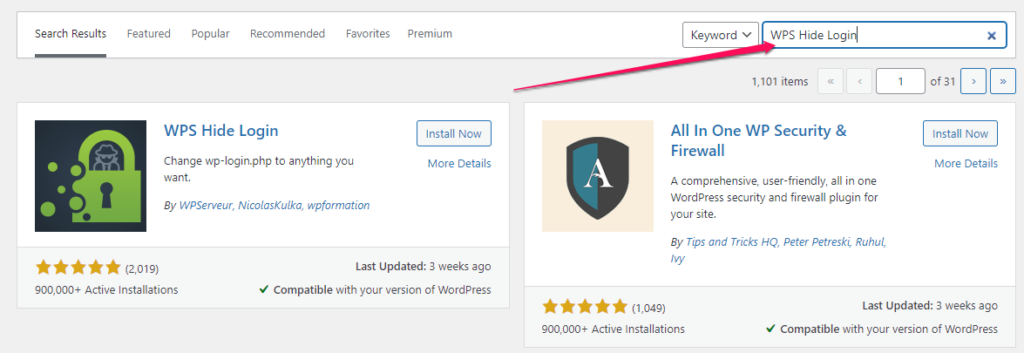
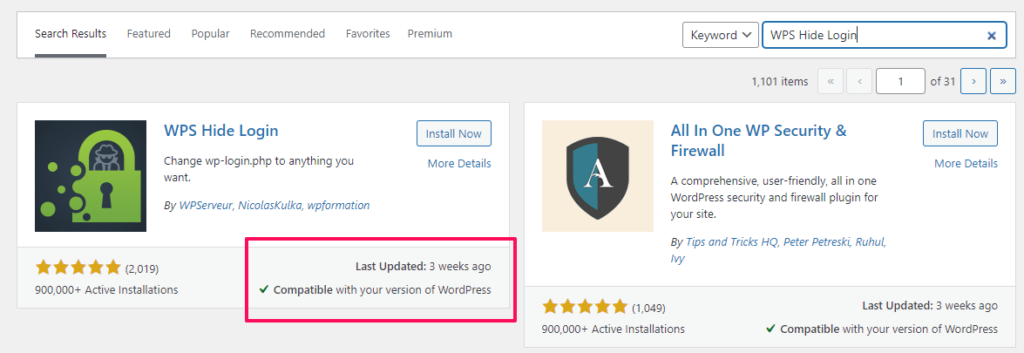
Check if the plugin is tested with your WordPress version.
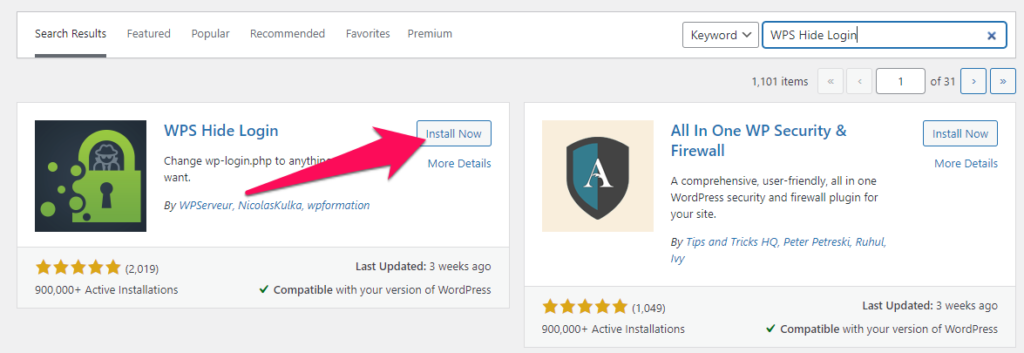
Click Install Now to begin the installation.
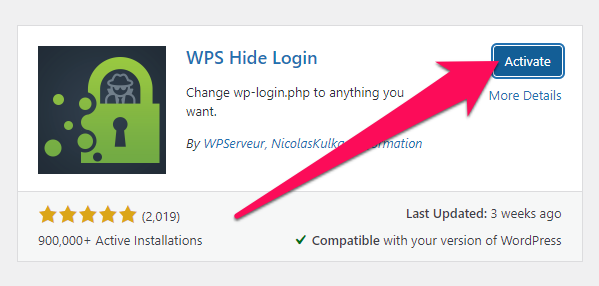
Click Activate to start using the plugin on your site.
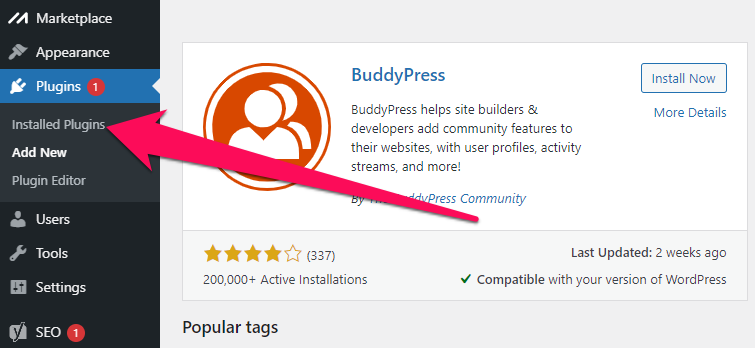
You have successfully installed the plugin and can see it in the Installed Plugins section under Plugins in your dashboard’s left menu.
Now it’s time to configure the plugin to create a custom WordPress login URL for your site.
Step 3: Configure The Plugin
Before changing your site’s login URL, you need to configure the plugin. Here’s how you can do it.
Go to Installed Plugins under Plugins in the left menu of your site’s dashboard.

Scroll down to find WPS Hide Login.
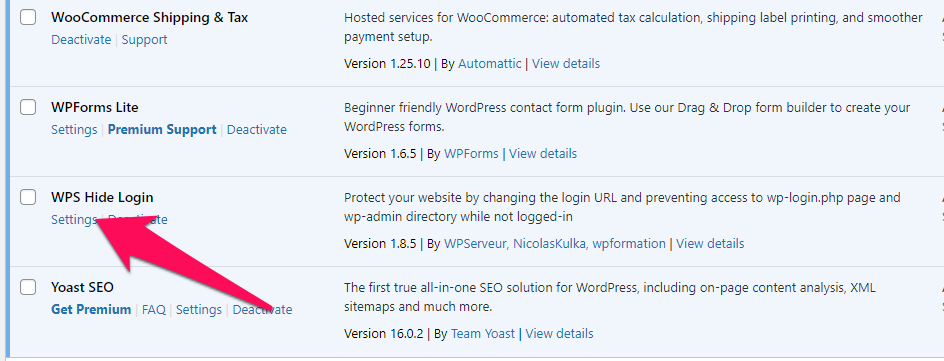
Click Settings under the plugin’s name.
In the settings section, you need to configure the new login URL of your site and the redirect URL when someone visits your old login URL (wp-admin or wp-login).

For the login URL, use a unique but memorable keyword that unauthorized users can’t easily guess. For example, if your brand’s name is Acme, your new login URL can be “acme-login-page.” Or anything else that you can easily remember.

For the redirect URL, you can either send visitors to a 404 page or your site’s homepage (or any other page you want.)
Click Save Changes to apply the changes and replace your old login URL with the new one.

After successfully applying the changes, you will see a confirmation message on the settings page.

Now you can only access your WordPress site’s login page on the custom URL you’ve configured.
Step 4: Update Bookmarks and Share URL With Team
Make sure you update all your bookmarks because it’s common for people to forget their new login URL.
If you have multiple website admins or registered users who need to access your login page, email them the new URL to avoid any problems.
Step 5: Test Your New Login URL
Finally, you need to test your new login URL to make sure everything’s working fine.
Here’s how to do it:
- Sign out of your WordPress website.
- Go to your old login URL to see if it’s still working or redirecting you to the new URL.
- Now go to your new login URL.
- Enter your username and password to log in.
If everything works the way you want, it means the plugin is working fine.
However, if you cannot log in to your site and the new URL isn’t working, you might need to reverse your plugin installation.
How To Go Back To The Original WordPress Login URL
Sometimes despite installing the plugin and configuring it properly, WordPress login redirection doesn’t work the way you want.
As a result, you can get locked out of your site because you can’t access any of your login pages.
If this happens to your site, you have a couple of options.
You can restore your site’s backup version, or you can disable and delete the plugin from your FTP account.
You can do this using a free FTP file transfer application like FileZilla or the File Manager feature in your hosting account’s cPanel.
This isn’t very technical, but you should seek help if you’re unsure how to do it.
You can find the WPS Hide Login’s directory in your WordPress site’s wp-content/plugins folder.
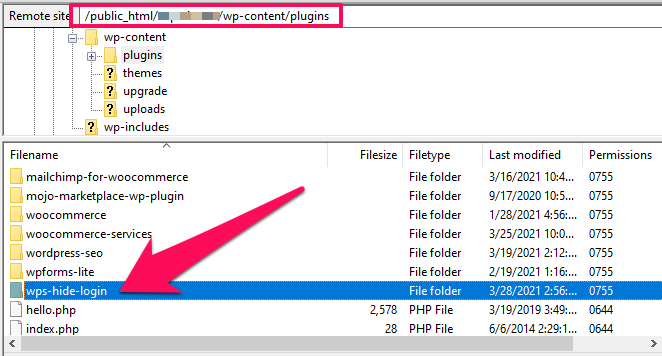
When you delete this folder from your FTP account, your WordPress login URL will go back to the default wp-admin and wp-login page.
Risks When Changing Your WordPress Login URL
Although there are very few risks in creating a custom WordPress login URL, some users might face the following problems.
Risk 1: Plugin Malfunction
Sometimes the plugin you’re using for creating a custom WordPress login URL can malfunction. If that happens (or any other mishap during the installation process), your login page might become unavailable.
To avoid this problem, make sure you’re using an updated plugin and complete its installation process without any interference.
If you have issues with your plugin, go back to the plugin directory and get a new one. Make sure to check the user reviews and plugin documentation if you have questions or concerns.
Risk 2: You Forget The URL
It’s common for WordPress users to forget their new login URL after changing it from the default page.
To avoid this problem, make sure you bookmark the custom login page or email yourself the URL.
Risk 3: Miscommunication With Team
If your site has multiple admins or registered users who regularly visit the login page, you need to communicate the URL change as soon as it happens.
Otherwise, your team can get locked out of the site and might face problems performing their job.


