In Google Analytics 4 (GA4), you can use Data Filters to include or exclude event data from being recorded by the platform. New data filters will take effect from the point they’re created, but they won’t affect your historical GA4 data.
Data filters apply a permanent change to your data. For example, if you exclude certain data from being processed by GA4, you won’t be able to retrieve that data in the future. If you want to hide your data without losing access to it, you must use the feature Report Filters instead.
The Evolution of Data Filters: GA3 VS GA4
Back in the last version of GA (Universal Analytics or GA3), users had access to two key features: Views and Filters. You could create a new view and then set up tons of filters that would exclude any data you considered unnecessary for live monitoring or an upcoming report. Views were a staple feature of GA3, allowing users to analyze metrics such as pageviews, events, and sessions in ways that didn’t affect the incoming raw data.
In other words, this was a great way to segment information and get granular control of your data.
With the forced move to GA4, the intricacies and details of all these features have been eliminated. The former views and filters have now been replaced with data filters, and, to some extent, Data Streams.
A data stream is an information channel that sends data from its source back to your GA4 properties, which can be your site, app, or another digital platform.
In short, views in GA3 have now been replaced with data streams, and what used to be filtered are now data filters in GA4. The consensus among professionals who actively used GA3 before the latest changes is uniform: the new additions are not as helpful, and, in some cases, are even detrimental to the actual needs of regular GA users.
The Only 2 Data Filters that Google Analytics 4 Lets You Set Up
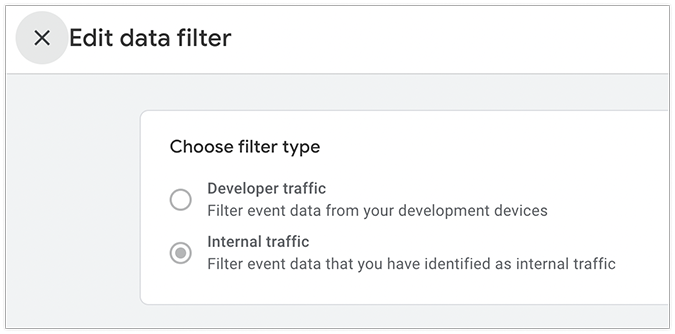
There are two types of data filters in GA4:
- Developer traffic
- Internal traffic
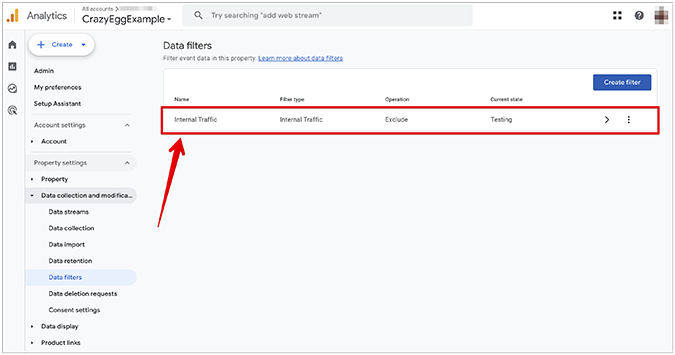
You can access filter types by navigating to Data collection and modification > Data filters, and clicking on any existing filter.
Developer traffic
Sometimes, you’ll have one or multiple developers working on your website or application using debug mode and DebugView (collectively referred to as debug tracking setups) in GA4. And, since your target audience isn’t developers hired and paid for by yourself, it’s important to exclude their incoming traffic. This traffic, known as developer traffic, can skew your analytics by adding in developer activity instead of tracking site hits from genuine visitors.
Currently, you can create up to 10 different data filters per GA4 property.
To create a developer filter, you must be logged in as an Editor or an Administrator in your GA4 account.
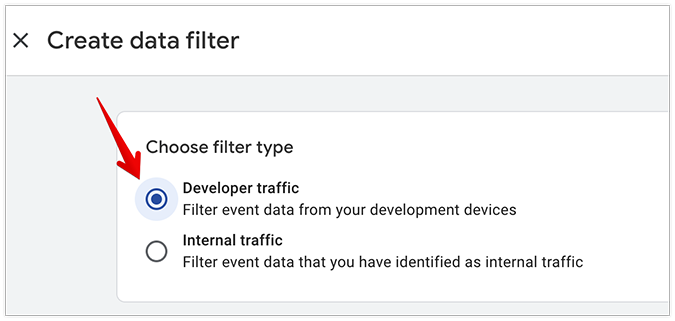
1. Once you’re logged in, navigate to Data collection and modification > Data filters, and click Create filter.

2. Then, choose Developer traffic.
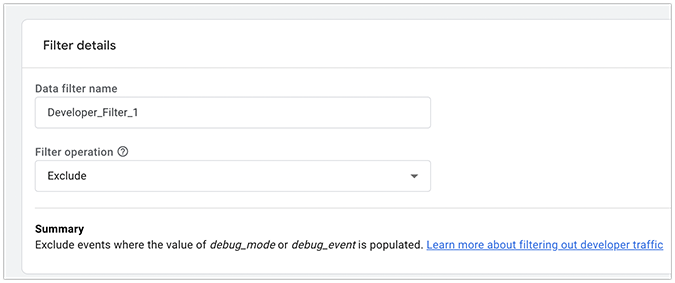
3. Name your data filter, and choose exclude.
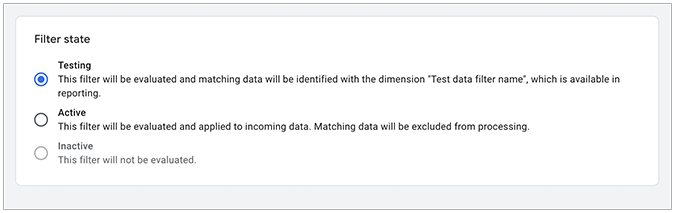
4. Next, choose between Testing, Active, and Inactive to select your filter’s state.
5. Finally, click Create.

It can take up to 38 hours for your new filter to start excluding developer traffic from your analytics reports. However, you can still access the excluded data by navigating to the DebugView report in GA4.
Internal traffic
Often, people working at your company, such as business associates, freelancers, contractors, or in-house employees, will—either intentionally or not—land on your website. Collectively, their actions are referred to as internal traffic.
In other words, people who generate internal traffic should not be considered commercially incentivized visitors, since their intent is not the same as someone who wants to buy, rent, or download something from your website (with some exceptions). Barring these exceptions, however, you generally want to exclude internal traffic from your GA4 reports.
Note: if you exclude developer traffic via the internal traffic function, your developers won’t be able to view the excluded traffic in GA4’s DebugView.
By default, every GA4 property comes with a set internal traffic data filter in a testing state. This means the filter is not active.
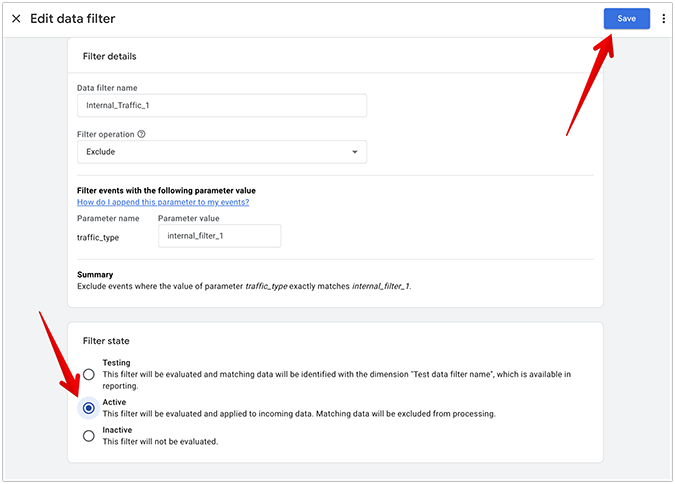
1. To activate the internal traffic filter, navigate to Data collection and modification > Data filters, and click the filter.
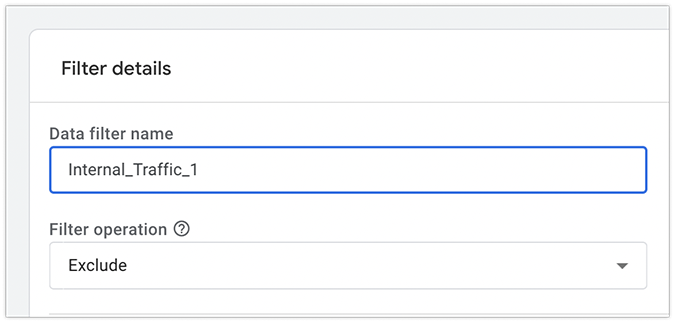
2. Choose a name for the filter, and choose exclude as your preferred filter operation.
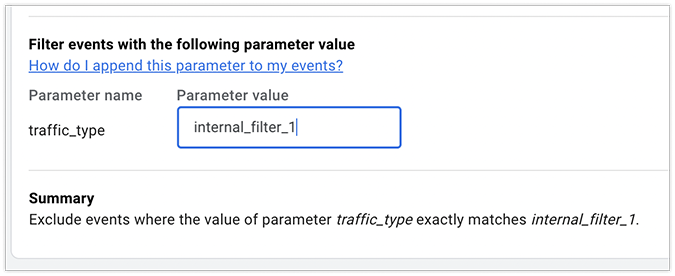
3. Next, change the name in the Parameter value field if you want to add multiple internal traffic filters.
4. Select Active, and click Save.
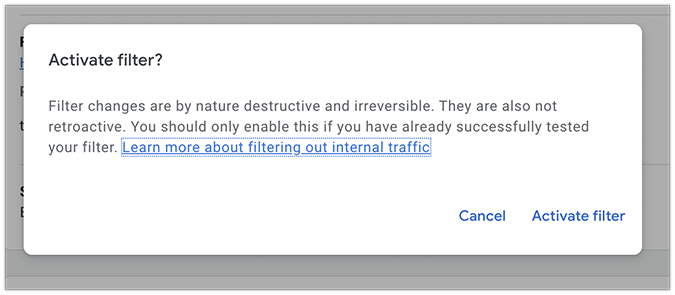
Make sure to test any filters before applying lasting changes. Any changes are irreversible and will lead to permanent data exclusions once you create and activate a new internal traffic data filter.
How Google Analytics 4 Data Filters Work
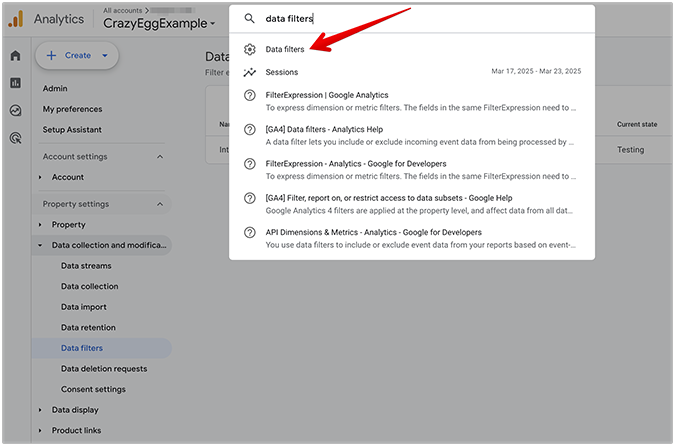
GA4 data filters have multiple parameters you can set up according to your preferences. To access data filters, navigate to Data collection and modification > Data filters from the left-hand side in the GA4 dashboard.
If you can’t see the menu, type “data filters” in the search bar, then click on the corresponding result that appears right below the search bar.
“Exclude” VS “Include only” data filters
Data filters have a number of parameters you can change depending on the results you want. In terms of Filter operation, you can set them to Exclude or Include only.
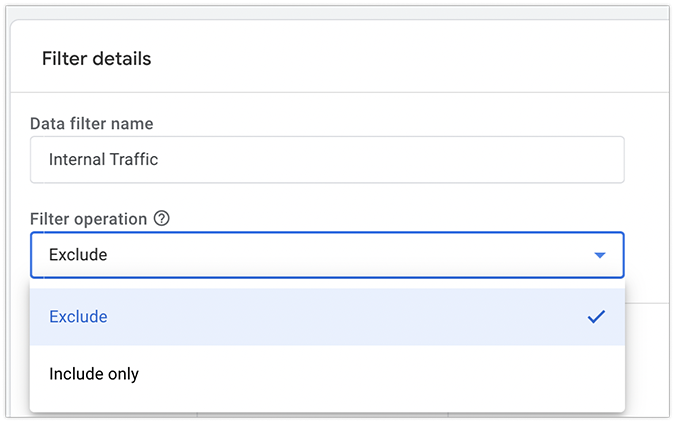
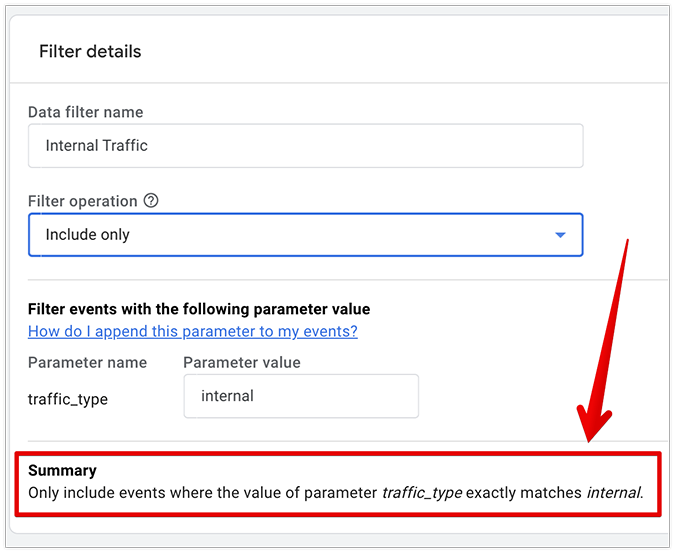
When you choose the exclude option, GA4 will omit any event data that corresponds with the main data filter. In our example, the filter will NOT process events with the value of its stated parameter that matches internal traffic.
If you set your filter operation to the include only option, Google Analytics will let through only event data that corresponds to the main data filter. In our example, this data filter will ONLY process events with the value of its stated parameter that matches internal traffic.
There are three things to note regarding the exclude and include only filter options:
- If you set up and activate both exclude and include only filters for a single GA4 property at the same time, the include filters will be considered first, while the exclude filters will be processed last in the logical chain.
- If you add and activate multiple include filters for a single GA4 property, all the include filters will be processed as a single unit.
- If you add and activate multiple exclude filters for a single GA4 property, each of the exclude filters will be processed one at a time.
“Parameter name” and “Parameter value”
The Parameter name and Parameter value options help you identify internal traffic. In contrast, developer traffic is defined by having the parameter name debug_mode or debug_event with the parameter value “1” automatically added to them.
Here’s how to manually add a traffic_type parameter to incoming events and change/edit its values.
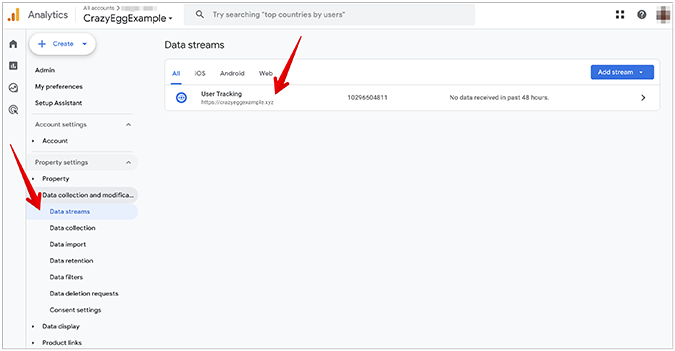
1. Navigate to Data collection and modification > Data streams. Click an existing web data stream.
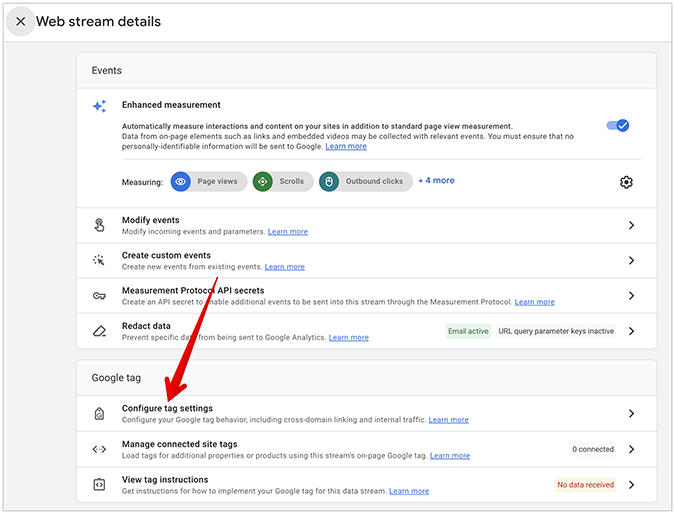
2. Scroll down and click Configure Tag settings.
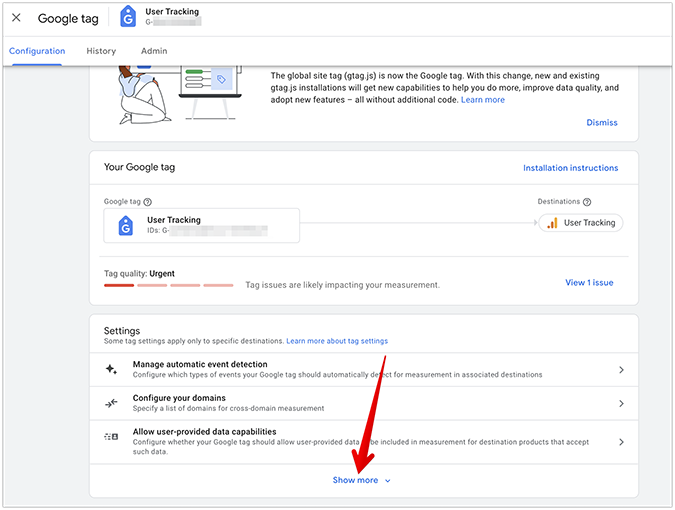
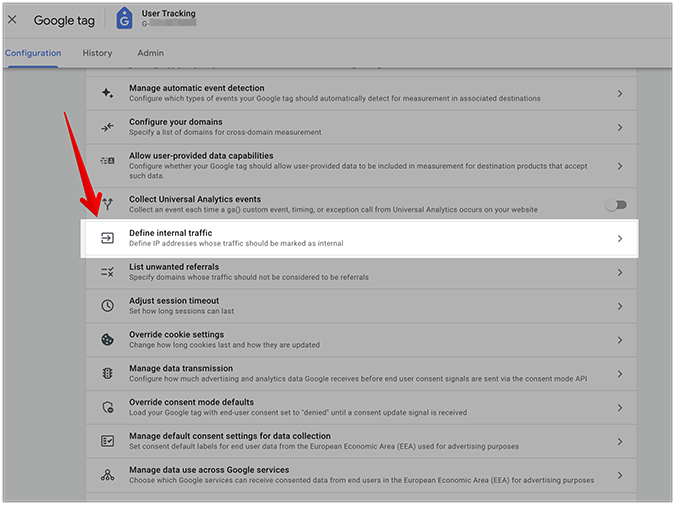
3. Scroll down and click Show more.
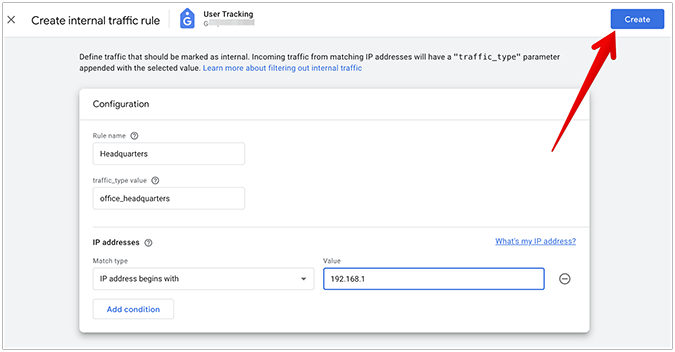
4. Click Define internal traffic.
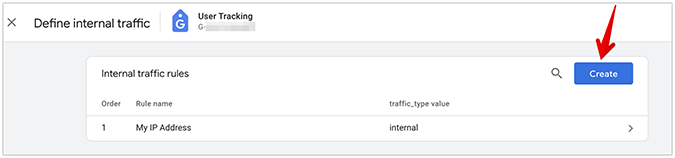
5. Click Create.
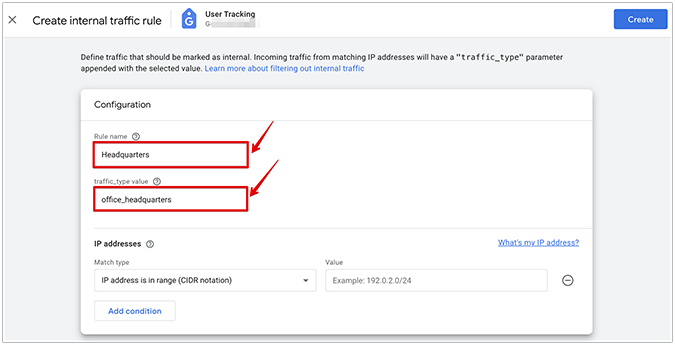
6. Enter a rule name and traffic_type value.
7. Select an operator, then enter an IP address or a range of IP addresses that match your traffic rule as defined in Step #6.
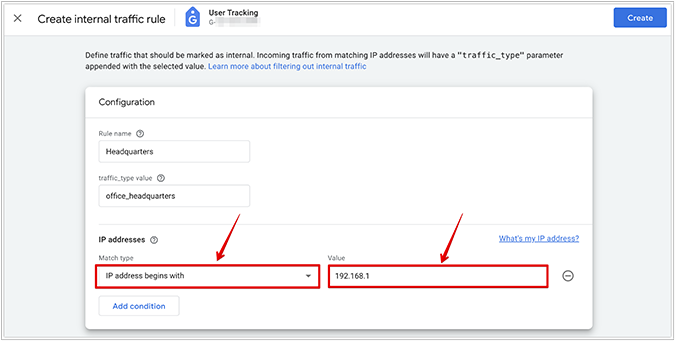
8. Click Create.
“Testing”, “Active”, and “Inactive” filter states
GA4 data filters offer three states:
- Testing
- Active
- Inactive
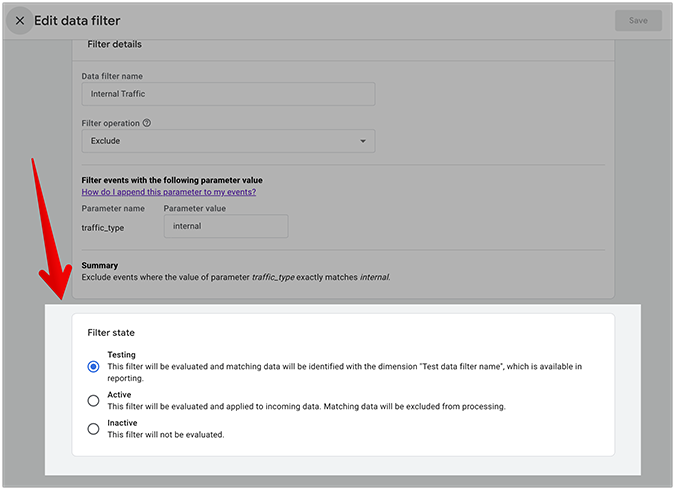
Testing state
When your data filter is in the testing state, GA4 is considering it in the background, but the filter itself doesn’t enact any permanent changes to your incoming traffic.
Use this state to test your new filter before making any permanent changes by switching it to the active state.
Active state
Once you set your data filter state to active, it enacts permanent changes to your incoming traffic.
Use this state to activate your new data filter.
Inactive state
When you switch your data filter state to inactive, you will effectively disable the filter, making it no longer possible for it to enact permanent changes to your incoming data streams.
Use this state to disable an existing data filter, or to prepare a new data filter for future use without enacting permanent changes to your incoming traffic.
Note: switching between data filter states doesn’t enact immediate changes. You might need to wait up to 30 minutes after applying a new filter before each new state takes place.
Should You Use the New Google Analytics 4 Data Filters?
The consensus among web professionals is clear and unanimous: not a single person—from professional web admins to rookie marketers—recommends using the new GA4 data filters, citing a multipronged list of reasons why this is the case.
First, most popular internet providers assign default IP addresses to their users by default, unless stated otherwise. These IP addresses are often changed and shuffled around without signaling prior notice to users.
For example, if you decide to manually create traffic_type parameters in order to filter out internal traffic, these rules might become obsolete over time due to a sudden IP address change. Additionally, users can bypass these filters by employing commercial or homebrew VPNs, plugins, add-ons, and proxy servers, rendering your efforts ineffective to begin with.
Second, you also run the risk of blocking genuine incoming traffic when the IP address of one of your employees now gets reassigned to a potential customer outside of your organization.
To solve this problem, you’d need to manually go back and update each IP address individually, which isn’t realistically feasible for medium and large companies.
Third, activating a data filter makes permanent changes to your incoming GA4 data streams. So, if your data filter breaks, you will be permanently left with skewed GA4 data, not being able to retrieve past data that was genuine but became lost during a troubleshooting event.
Setting up data filters in GA4 is simply not worth the hassle. Screening out internal traffic was always considered a waste of resources—even with past Google Analytics versions when most features and parameters worked as intended. The impact on traffic is always marginal, so you won’t notice a difference either way.
At the risk of sounding like an unwarranted tech obituary: RIP Google Analytics filters, you will be dearly missed.